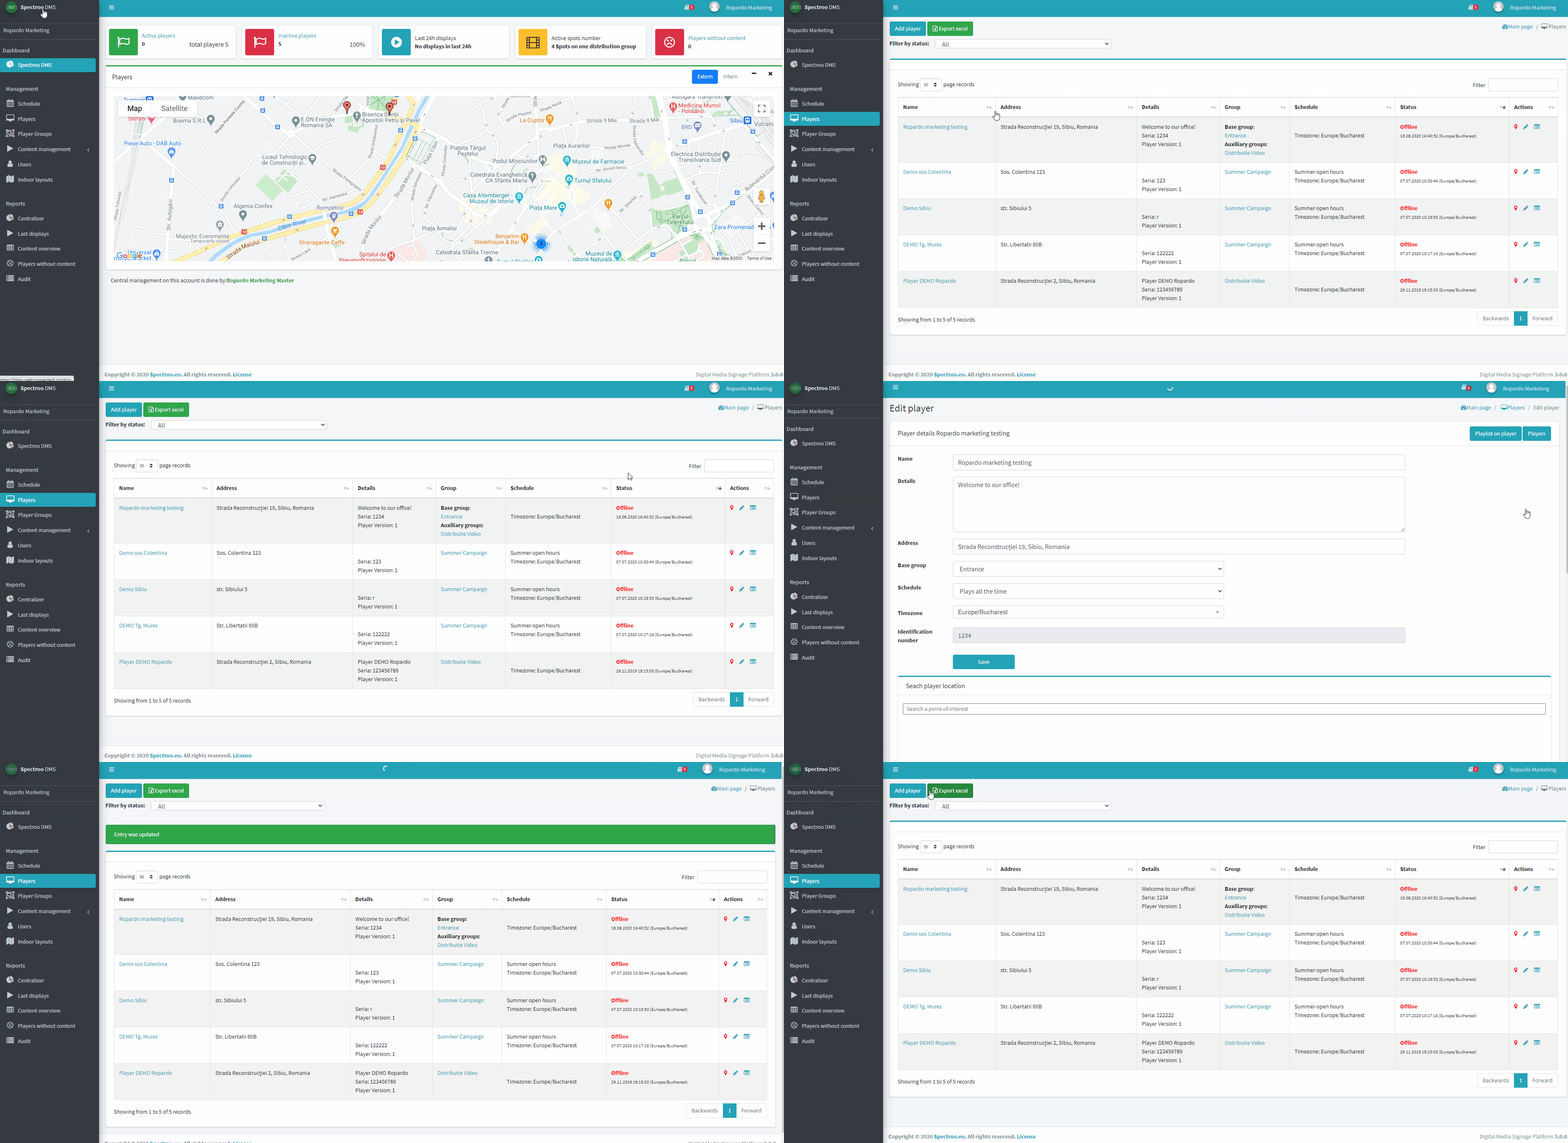
From this section you can Add/Edit players. You can only add a player if you have already created a player group to assign it to. As such, before adding a new player, you have to verify if the group you want to assign the player to is already added in the system.
This video shows you the whole Players section in the Spectro:o web platform:

How to edit a player?
The main page of the Players module gives you access to the list of players with the possibility of editing existing ones and adding new players.
The “Status” column shows the status of the player’s connection to the server and the last time the player was connected to the management server.
In the “Actions” column, we can view the player’s location on the map by clicking on the map icon. By clicking on the Playlist symbol in the “Actions” column, you have access to the playlist.
If the playlist belongs to a player group that chose the 18 positions playlist type, you will be notified about it : a list of the content in the player group will be displayed. You can close it to continue editing the content directly allocated on the player.
You can access the 18 positions playlist by clicking on the View active TPS playlist button.
You can edit the details of a player by clicking on the pencil icon in the “Actions” column or just click on the name of the player. A new window will open containing all the details of the selected player.
Data specific to a player:
- Name – refers to the name of the player and, once set, the player will later appear under this name in the management platform as well as in the centralized reports;
- Details – in this text field you can add any details (mentions) that you want to keep.
- Address, Latitude and Longitude – refers to the geographical coordinates of the player that are used to represent on the map the exact location where the player is installed. Attention! This data will be filled in automatically by searching for the location on the map or by moving the mouse on the map in the footer of the page, it is not necessary to enter it manually. The “Address” field can be changed later as desired.
- Group – refers to the group of players to which the current player belongs. To change the group, choose another group defined in the system by selecting it.
- Schedule – if you want a custom schedule for the current player you can choose this schedule from the selection list.
- ID number – refers to the unique identification number of the terminal. This field should only be changed when absolutely necessary. By accidentally changing this information, the player will disconnect from the management platform and will no longer be able to sync content.
After modifying the desired information, click on the “Save” button . In case of errors, they will appear under the corresponding fields.
How to add a new player?
To add a new player, click on the “Add player” button shown in the top left side of the player screen.
Attention!
If you want to do this, first make sure that:
- You have the player ID number provided by the application provider.
- You know the exact location where the player is installed.
- The group you want the player to be assigned to is already created.
At the bottom of the player page you can choose a position of the player on the indoor layout. For this you have to select an indoor layout form those uploaded in the Indoor Layouts section.

