

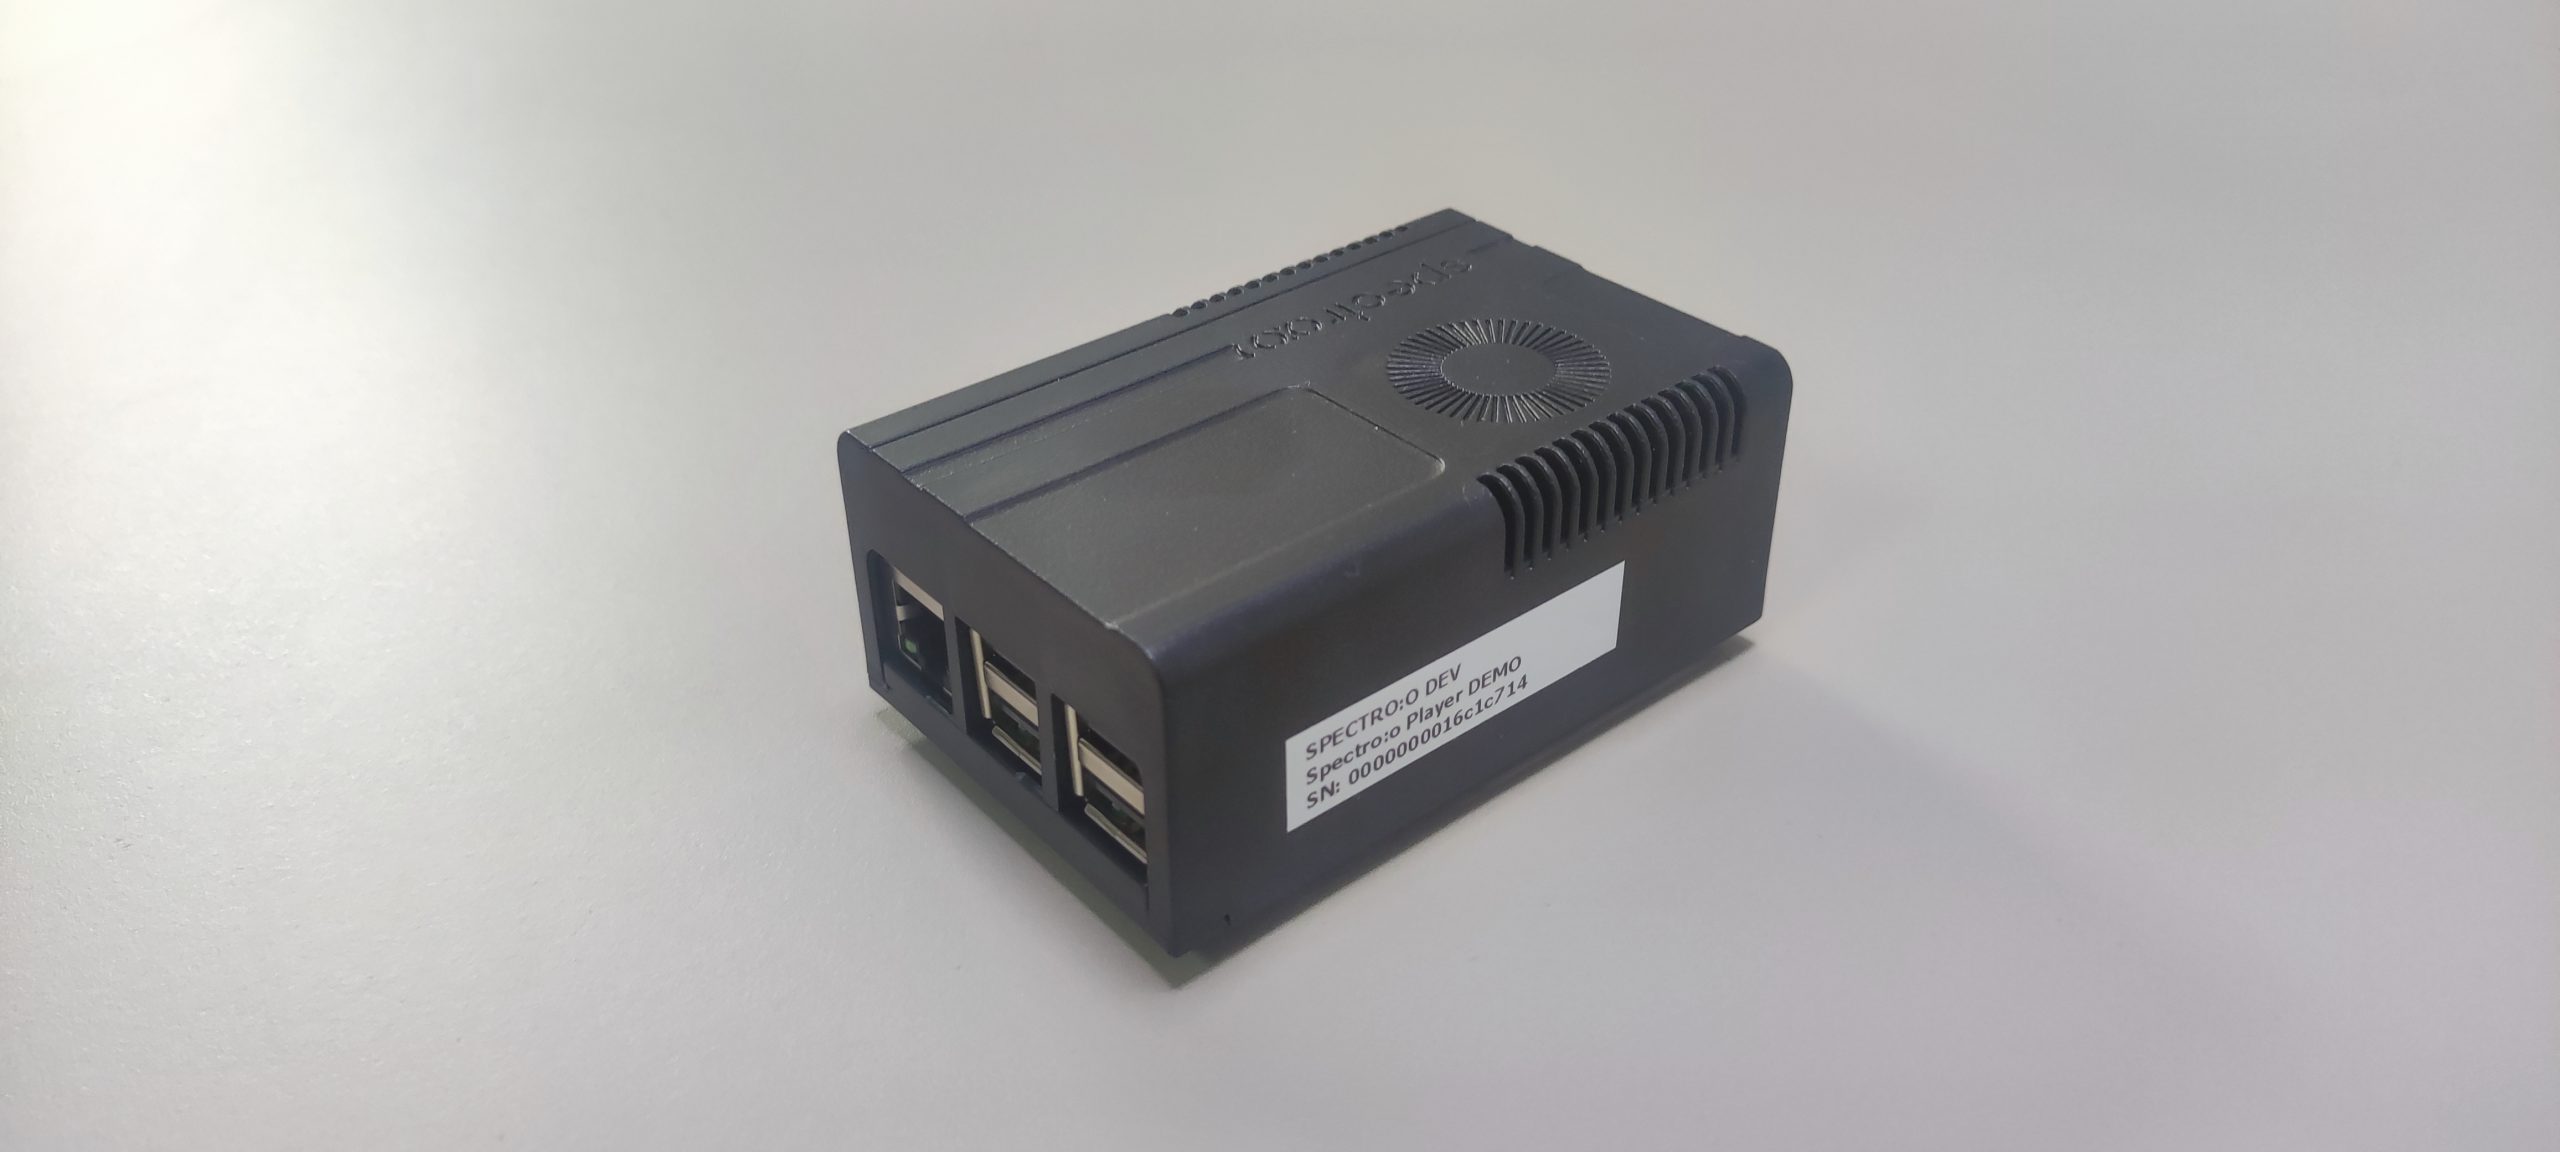
First Step 1 – Identifying the Player
Each player has a label attached to it’s case, printed with a unique identification code, which helps recognize it within the clients network. This is illustrated in the image below.
Second Step 2 – Accessories
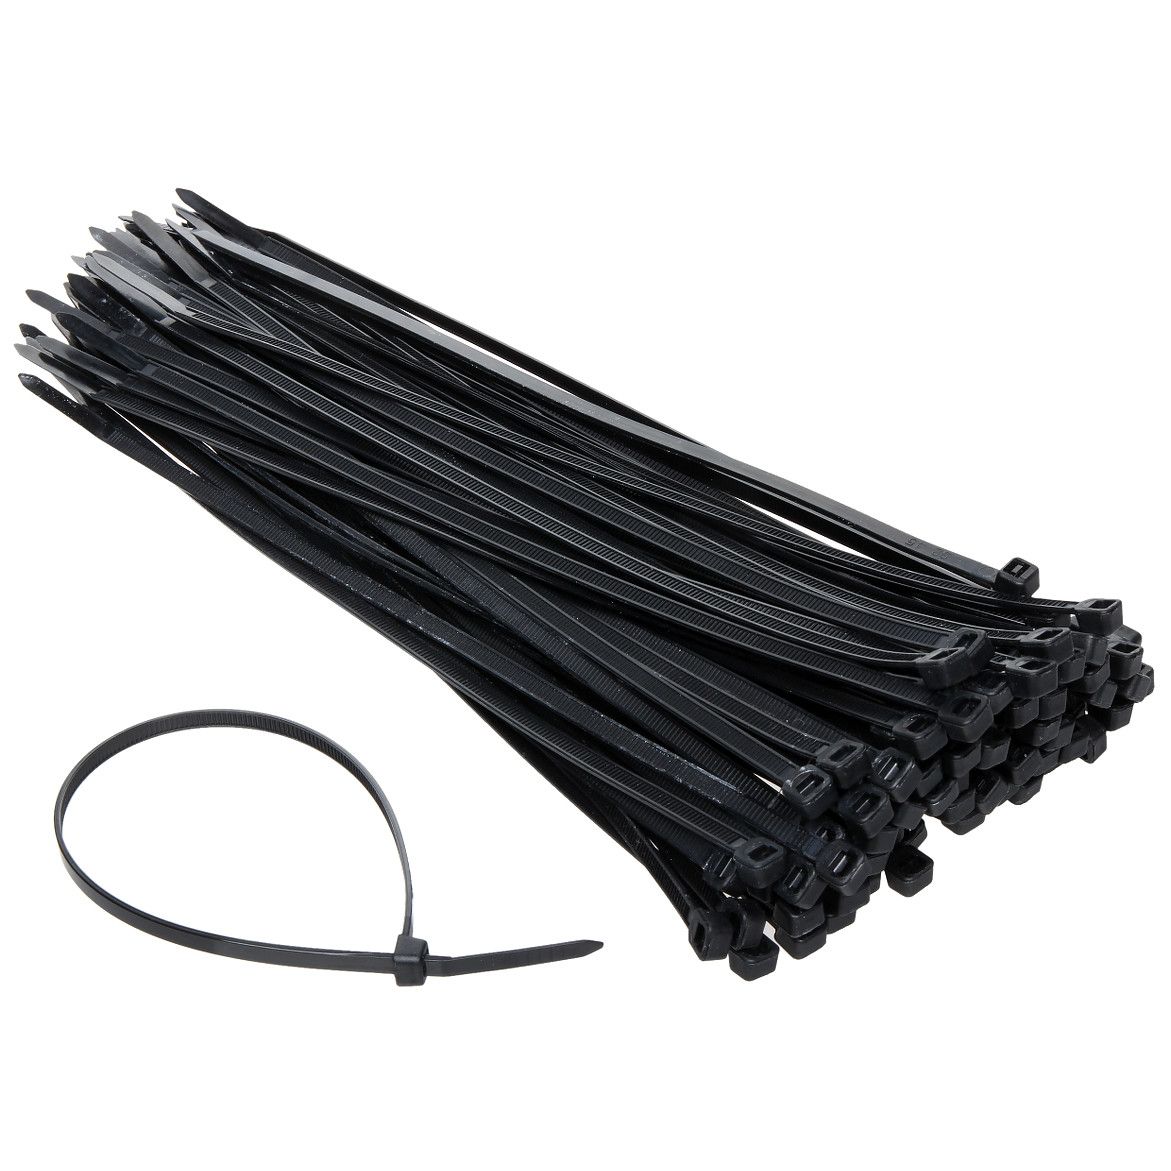
From the received package, take the following accessories:
- 1 x HDMI Cable

- 1 x Power Adapter

- 2 x Plastic Cable Ties
Step 3 – Installing the Player
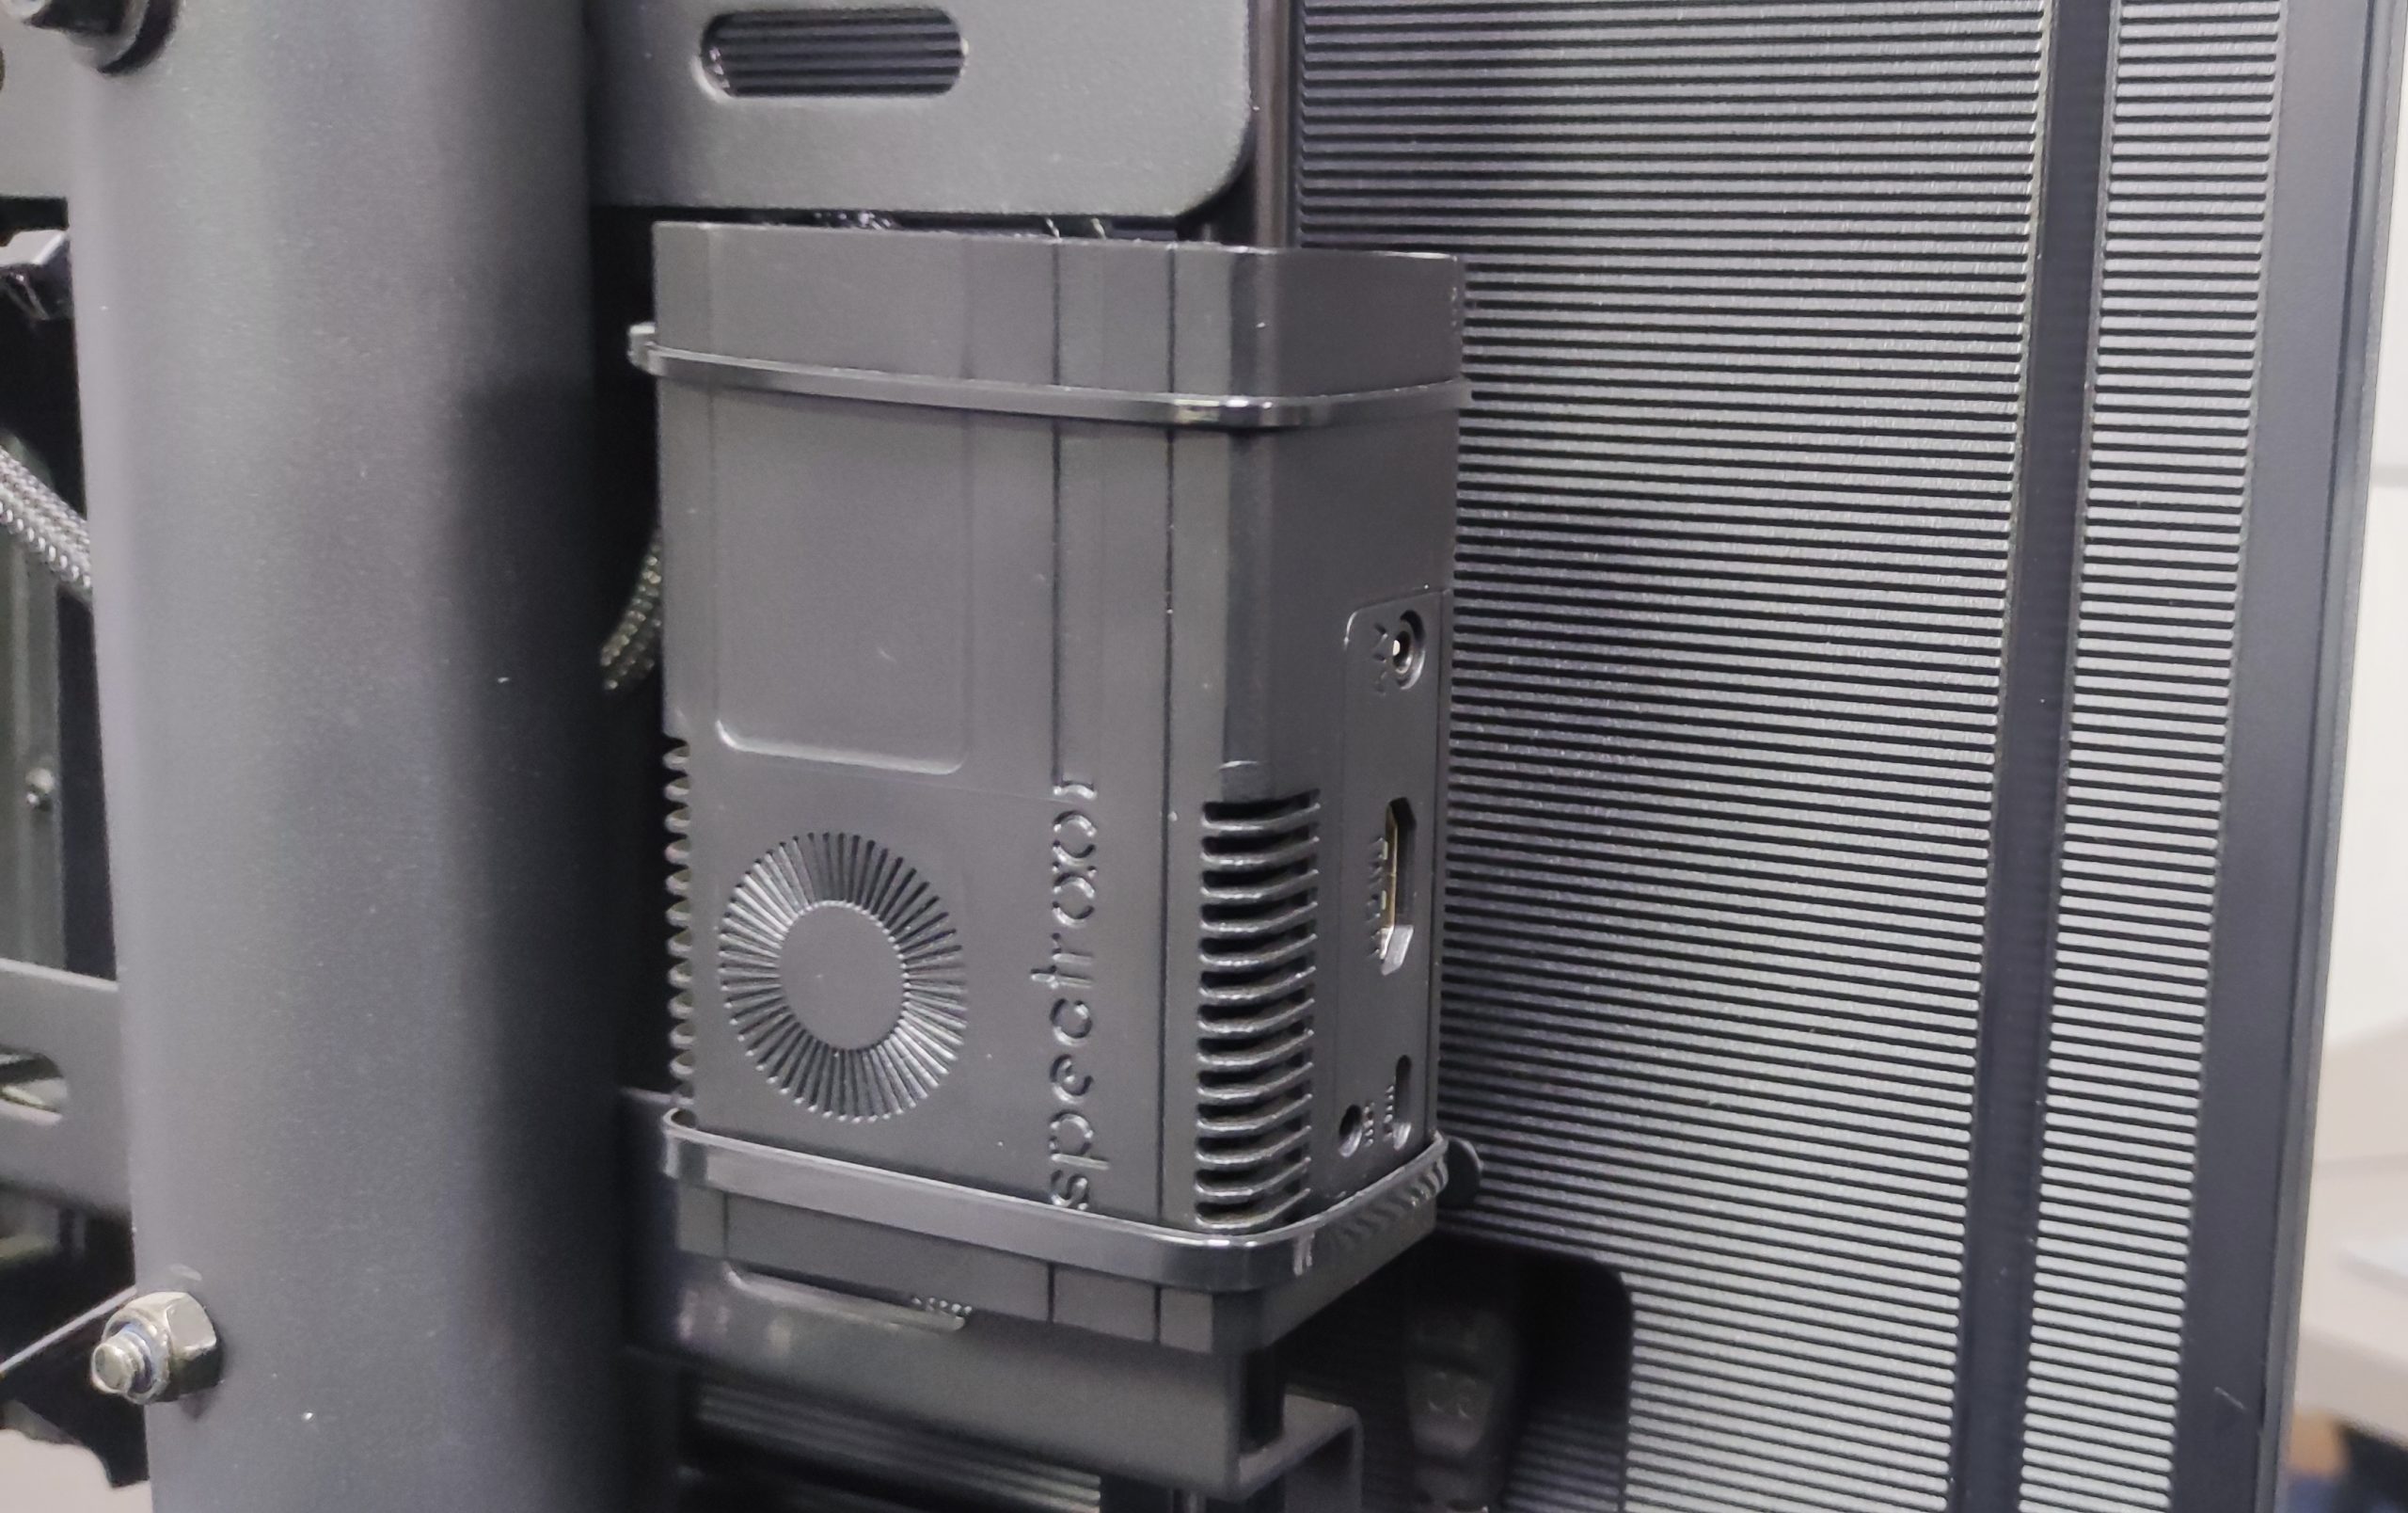
Without connecting any cables, attach the player to the TV using the large plastic cable ties, as close as possible to HDMI port 1. The player can be secured to the TV’s plastic grill or metal support, ensuring that the cable connection ports remain accessible.
Step 4 – Connecting the HDMI Cable
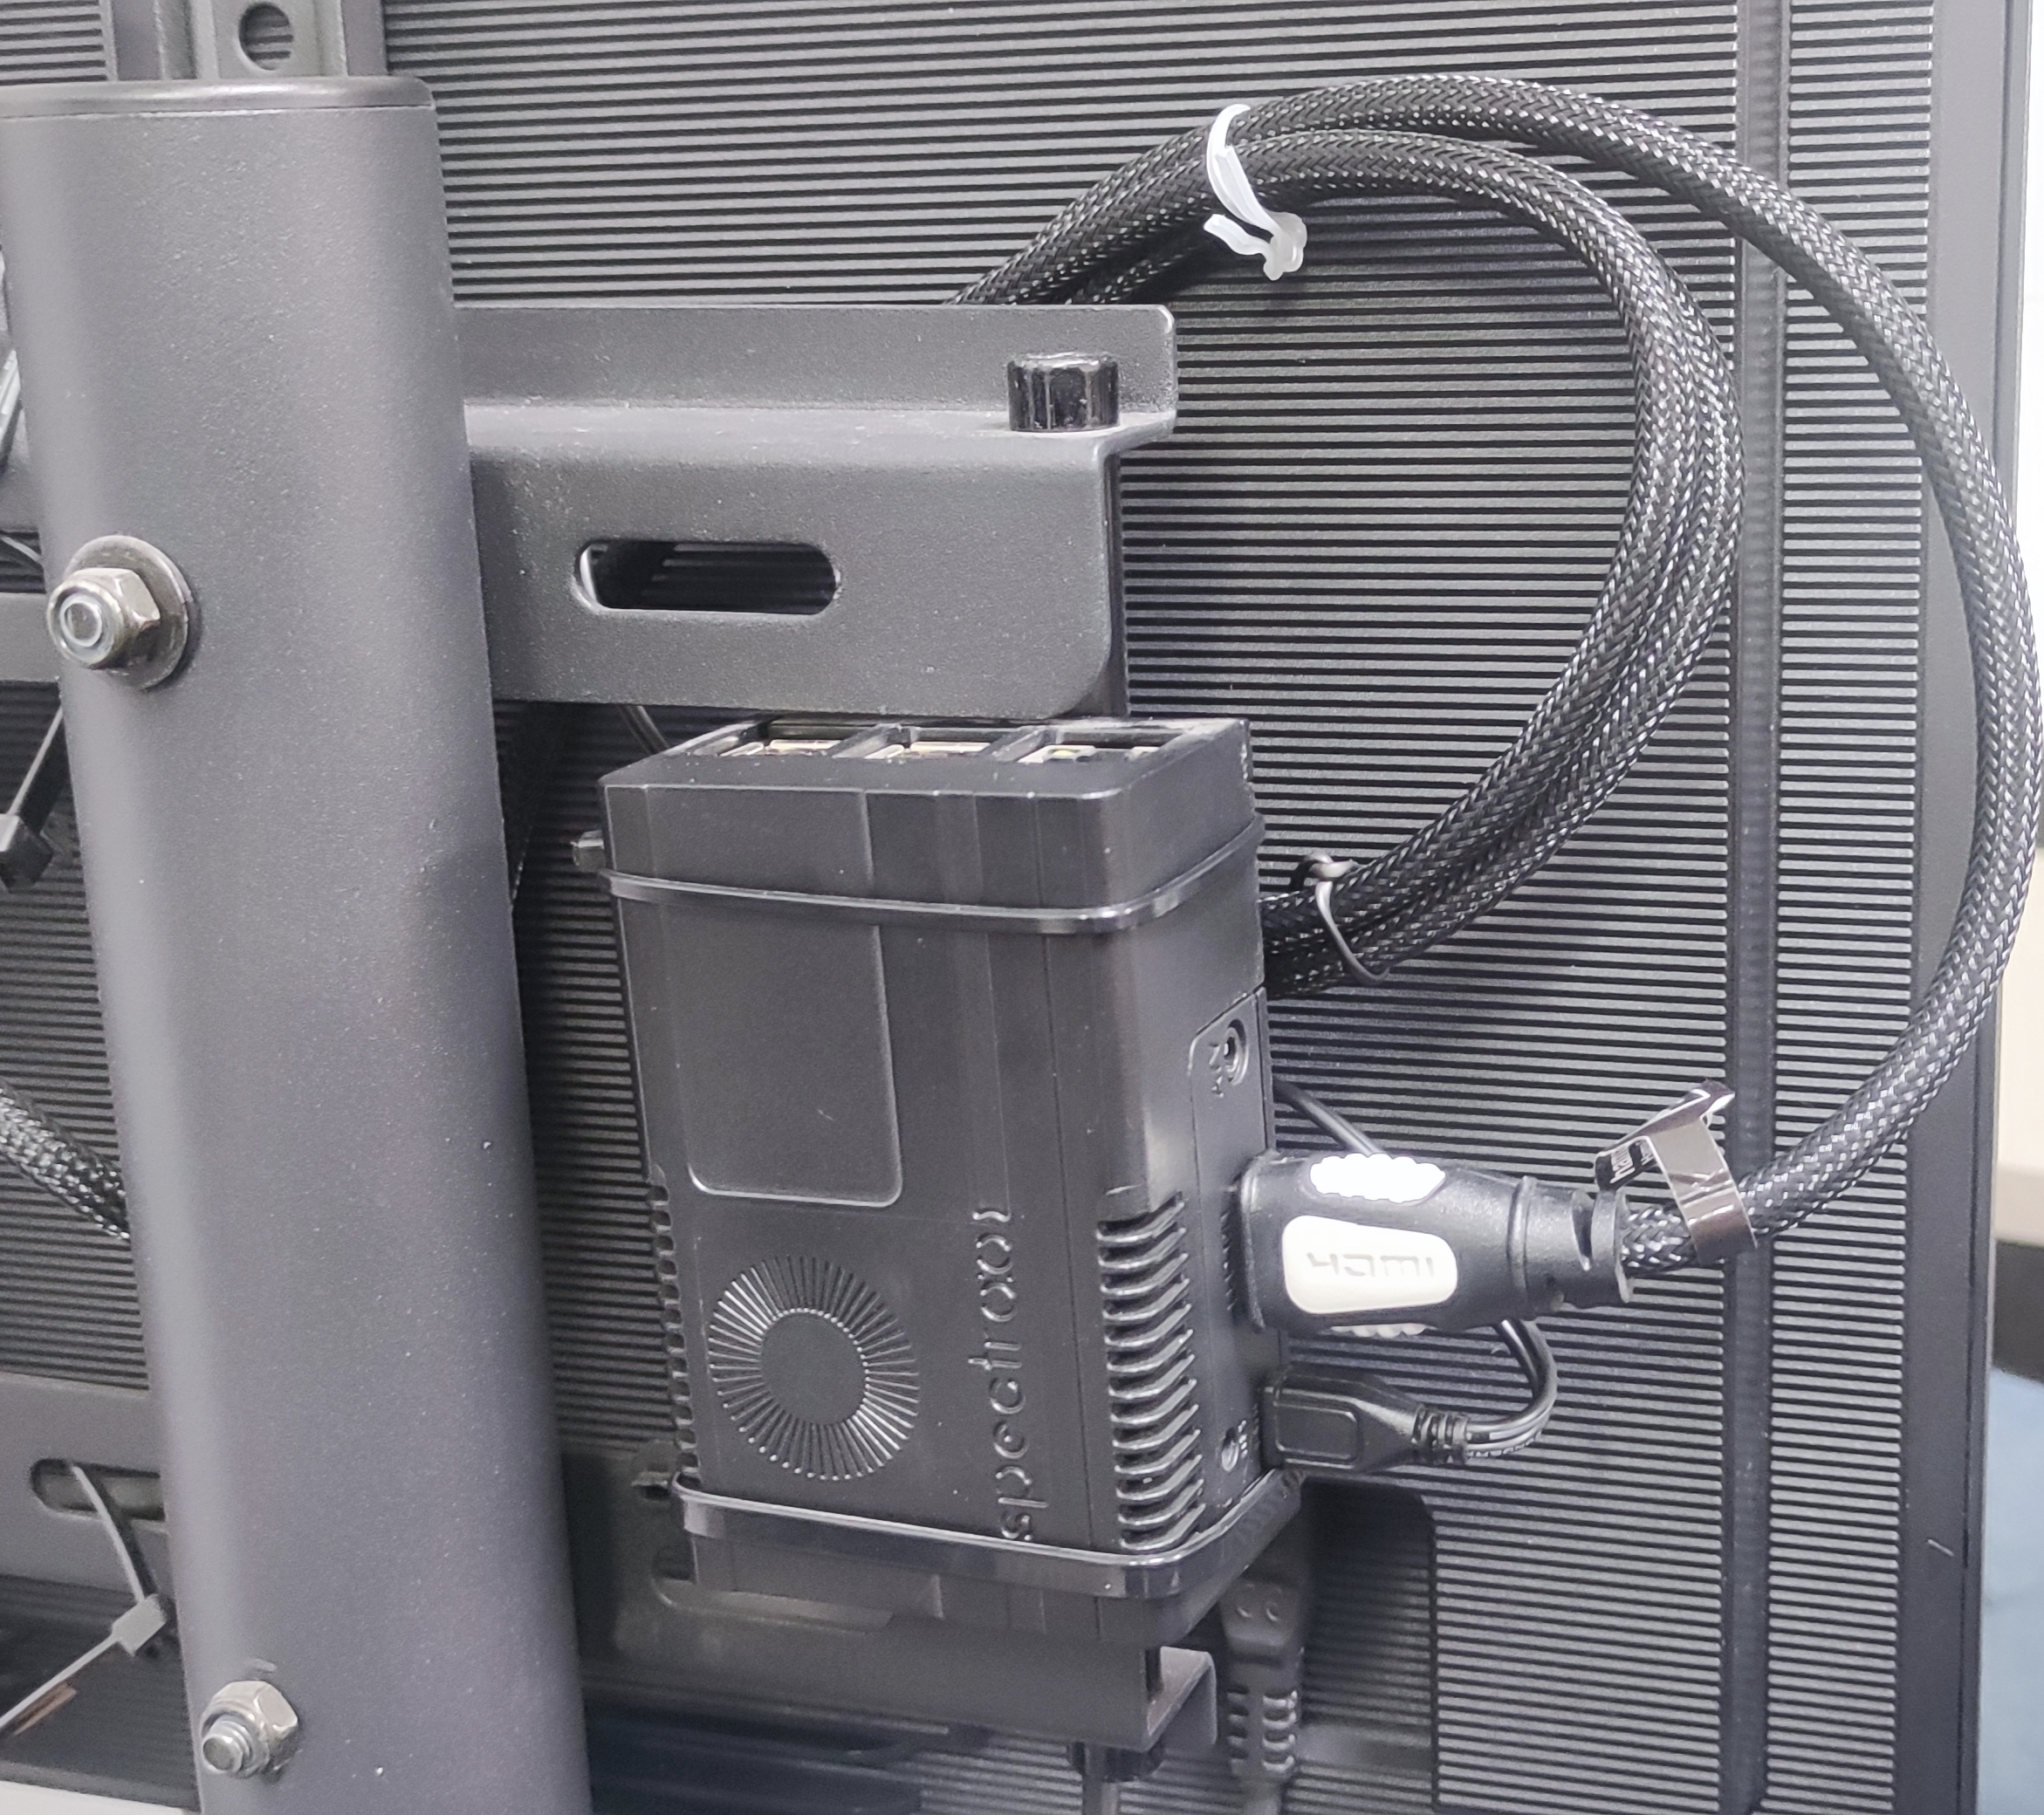
Connect the HDMI cable to HDMI port 1 of the TV, and the other end to the HDMI port of the player.
In most cases, the cable can remain coiled as it came in the package, with no need to unwind it.
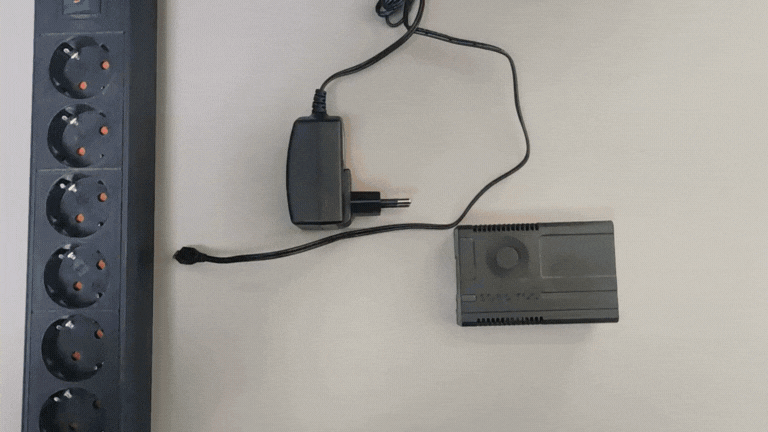
Step 5 – Connecting the Power Adapter
Connect the power adapter to a 220V outlet, and then to the player’s micro USB port.
Step 6 – Turning on the screen and switching to HDMI 1 Input

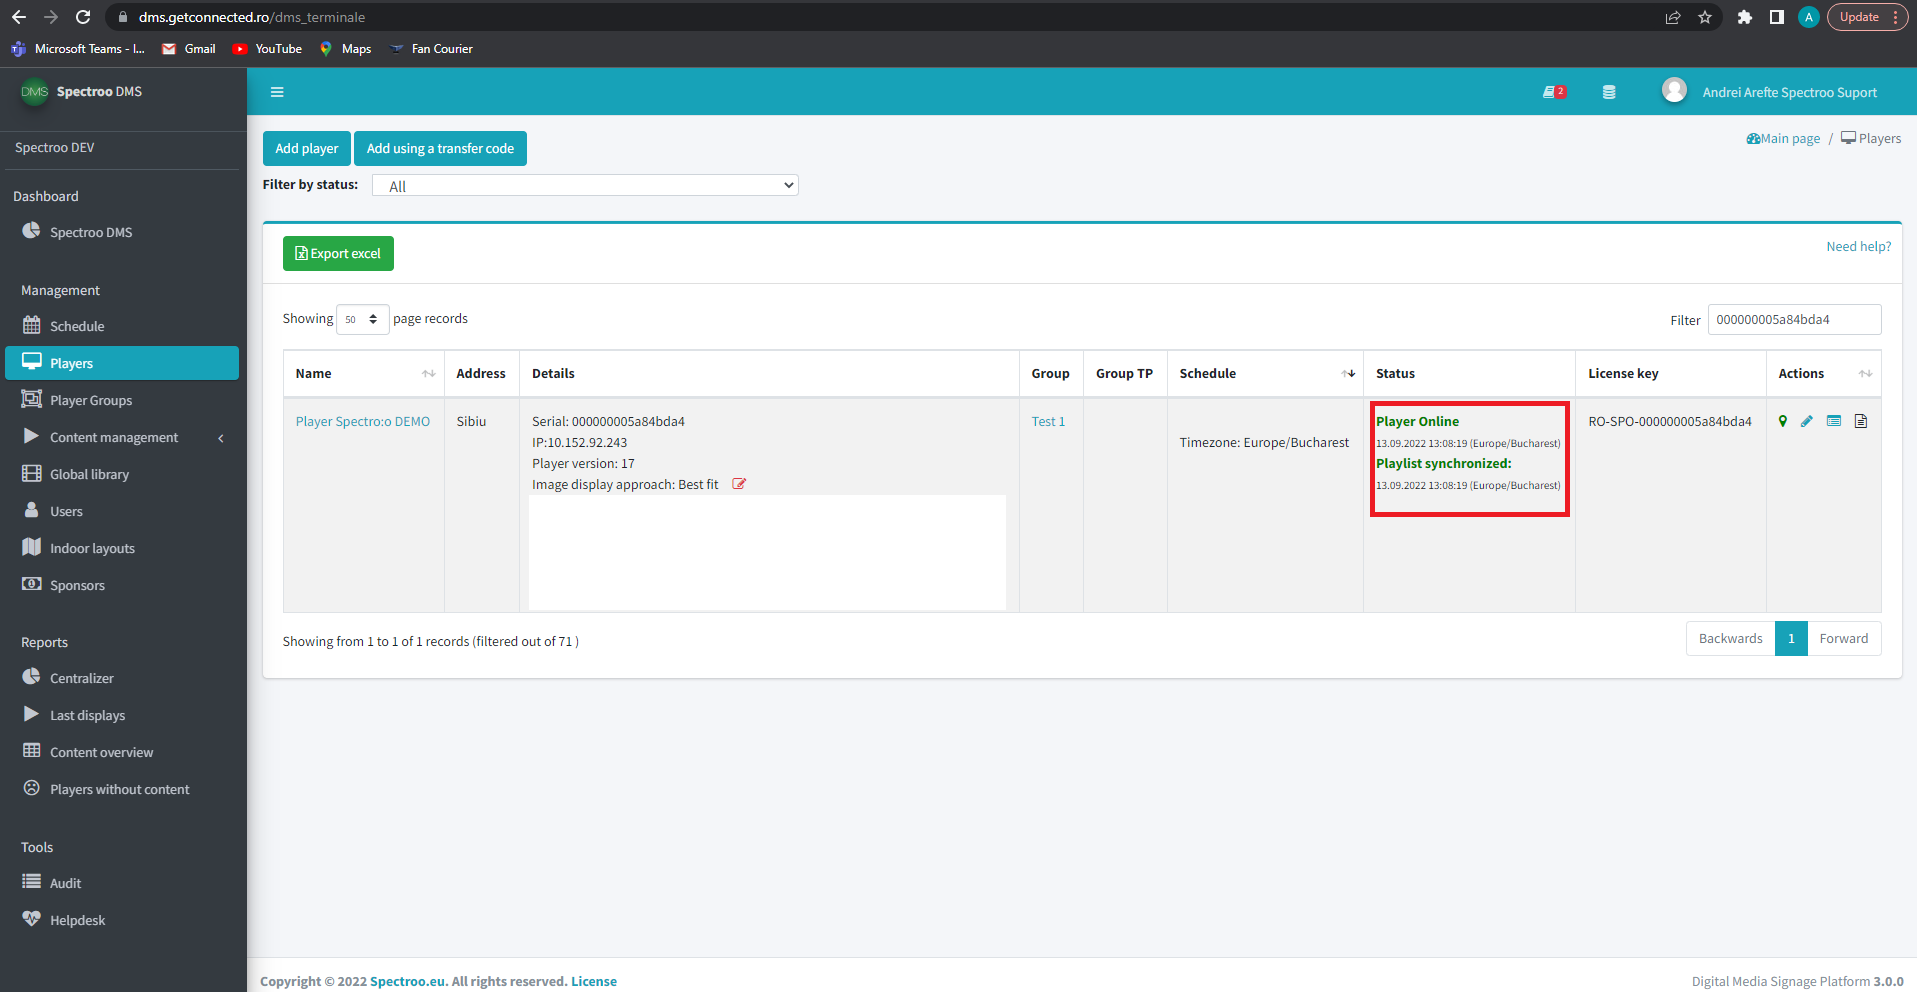
Attention! After connecting the first player to the screen, it is necessary to verify it in the Spectro:o DMS platform. Within 10 minutes of installation, the player should become active.
Verification is done in the management platform available at https://dms.getconnected.ro, in the “Players” section. Search for the installed player in the list, and on the “Status” column, the message “Online” should appear.
After confirming the first player is working properly, you can continue installing the remaining players by repeating the previous steps.
If you have any questions about this process, feel free to contact us at:
Spectro:o Help Desk: helpdesk [at] spectroo [dot] eu or at the phone number 0040372 794 772.